 About YUU日本語
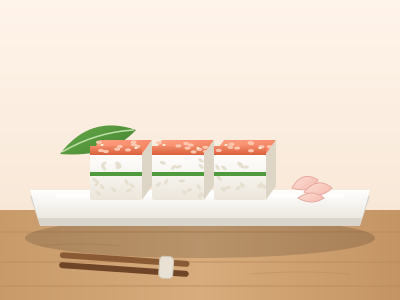
Grilled Salmon Pressed Sushi (No Mold Needed)
Serves 2 (6 pieces) · About 1 hr 30 min (50 min of this is just waiting for the rice to soak and cook)
Grilled, flaked salmon and sushi rice with sesame are layered in a food container lined with plastic wrap and pressed firm. You don't need a special mold.
① Cook the rice→② Grill and flake the salmon→③ Make the sushi rice→④ Layer in the container and press→⑤ Cut
What to buy
Fish
Vegetables
Rice & seasonings
Check what you already have
Tap an item to check it off (checks clear when you close the page).
How to make it
1
Cook the rice with a little less water
- Wash 1 go of rice in a bowl 2–3 times, changing the water
- Put it in the rice cooker pot, add water up to the 1-go line, then take out 1 tbsp of water
- Let sit 30 minutes, then cook on the regular setting (or the 'sushi rice' setting if there is one)
How to tell it's doneThe rice cooker beeps when it's done. While it cooks, go ahead with step 2.
2
Grill and flake the salmon
- Line a frying pan with parchment paper and lay the salmon skin-side down
- Cover and cook over medium-low heat for 3–4 min, flip, and cook another 3–4 min
- Put it on a plate, let it cool a little, and remove the skin and bones with your hands
- Flake the fish finely with a fork or chopsticks
How to tell it's doneWhen you break open the thickest part with chopsticks, the color has changed all the way through, with no see-through parts.
Be carefulSmall bones are easy to miss. Feel with your fingertips as you flake it.
3
Make sushi rice with sesame
- Mix 2 tbsp vinegar, 1 tbsp sugar and 1/2 tsp salt well in a small bowl to make sushi vinegar
- Put all the freshly cooked rice in a bowl, pour the sushi vinegar over it, and mix with a cutting motion using a rice paddle
- Add 1 tbsp white sesame seeds, mix, and fan it to cool
How to tell it's doneAlmost no steam comes off, and it's slightly warm. The sesame seeds are spread all through.
4
Layer in the container and press
- Line the container with a large piece of plastic wrap, letting it hang over the edges by about 10 cm
- Spread all the flaked salmon flat across the bottom
- Add half the sushi rice, smooth it flat, and lay 4 shiso leaves on top
- Add the rest of the sushi rice, smooth it flat, and fold the overhanging plastic wrap over it
- Press firmly from the top with the bottom of the other container (or your palm if you don't have one), and let sit like that for 10 min
How to tell it's doneWhen you lift it up by the plastic wrap, it keeps its square shape and doesn't fall apart.
5
Flip and cut
- Take it out of the container with the plastic wrap, and flip it onto the cutting board so the salmon side is up
- Remove the top plastic wrap. Wipe the knife blade with a damp cloth to wet it
- Cut into 6 equal pieces on the cutting board. Wipe the blade after each cut
- Remove the bottom plastic wrap and arrange on a plate
ReadyOn the cut side you can see layers: salmon, sushi rice, green shiso, sushi rice. Eat it the same day.
📚 Learn more about this dish
🥬 Ingredient guide
🔪 Cutting & cooking tips
If it didn't work out
It falls apart when cutYou didn't press hard enough, or it didn't sit long enough. Rewrap it in plastic wrap, press again, and let sit 10 min.
The salmon is dryYou overcooked it. Next time, turn off the heat as soon as the color has changed all the way through.
Too saltyThe salmon was too salty. Next time, choose salmon labeled "amajio" or "usujio" (lightly salted).
It sticks to the containerThe plastic wrap was too small. Next time, line it so it hangs well over the edges.
Was this recipe helpful?
This site is free with no ads. If you like, you can support it with a tip.
☕ Send a tip Choose how many cups. Everything stays free to read.Made by YUU, a teen who loves cooking → About me